Up and coding with React Native
Note
This article was written in 2018, React native has changed a lot since then and parts of this article may now be out of date.
I’ve learned a lot since writing this article and there may be better ways available to achieve your goal, I’ve left this unedited as a reference, so please keep this in mind if you’re following along.
Installation and setup
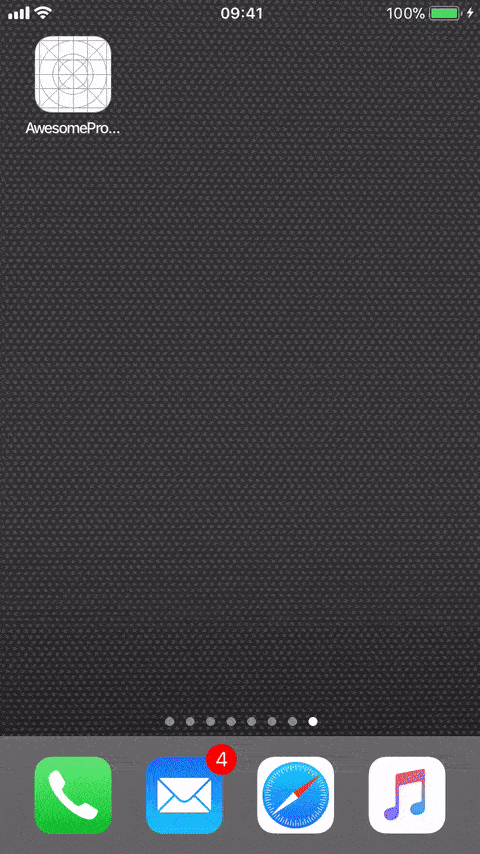
This is what we will create.
Let’s build a native app with react native, we won’t use Expo, we’ll handle the bundling of native libraries ourselves to give us maximum control over our code base and our app.
We’ll integrate the following libraries.
- React / Redux
- React Native Vector Icons
- React Native Navigation
- React Native Splash Screen
Tip
- Double click on code blocks to automatically select all text within it.
- Replace NEW_PROJECT_NAME='YourProject' with your project name so you can following along.
- You should be able to copy and paste all the commands below straight into your terminal to create all the files as required.
NEW_PROJECT_NAME='AwesomeProject'
# Install react-native-cli helper
npm install -g react-native-cli

# Traverse to your project directory
cd ~/xCode

# Init our project (the directory will be created for you)
react-native init $NEW_PROJECT_NAME

# Open our project in webstorm
wstorm $NEW_PROJECT_NAME

# Open a new terminal and run the following
cd $NEW_PROJECT_NAME
react-native run-ios

# I won't show android, but you can start it using the following
# react-native run-android
You will see a packager open in a new terminal window, keep this open, it runs our development server which serves the bundle to react-native on the device.
Everything should compile and you should see your new project in the iOS simulator.

If you’re having any issues, try updating your xcode. You can also manually boot your app using the following:
# Manually start our packager - react native uses yarn, so we'll use that from now on.
yarn run start

# Open your project in xcode, and build and run manually on your selected device
open ios/*.xcodeproj/
This is all from the react native docs: https://facebook.github.io/react-native/docs/getting-started.html
React Native Vector Icons
A simple way to get started with vector icons in react native (for both iOS and android) is react-native-vector-icons.
# Add it via yarn
yarn add react-native-vector-icons

# Link the native library automatically
react-native link

# Recompile your application (we installed the fonts and library which must be copied natively)
# If you look inside Project > Build Phases > Copy Bundle Resources you can see our icons
Tip
If you’re having any issues with integrating packages check the manual instructions on the github page, react-native link can sometimes fail and your app will fail to compile. You can fix these by manually checking your header search paths, link libraries and anything else specified by the package instructions.
Create a Splash Screen
When our app starts, we see the default plain splash screen with the text “Powered by React Native”.
Let’s use react native splash screen to add our own custom splash screen and also dismiss it through javascript.
yarn add react-native-splash-screen
react-native link react-native-splash-screen
Next we need to update our AppDelegate.m to include the SplashScreen library and have it continue displaying our splash screen before didFinishLaunchingWithOptions returns.
#import "SplashScreen.h"

- (BOOL)application:(UIApplication *)application didFinishLaunchingWithOptions:(NSDictionary *)launchOptions
{
  ...
  [SplashScreen show];
  return YES;
}
Inside your main index.js boot file, add the SplashScreen.hide(); after the icons promise has resolved.
import SplashScreen from 'react-native-splash-screen'

iconsLoaded.then(() => {
    SplashScreen.hide();

    // Boot Navigation
})
Open xCode and design your splash screen in the LaunchScreen.xib, use Add files to project to add images to your project and then drag an image view from the object library to your splash and reference your image within it’s properties.
Redux
What’s a react app without redux. Let’s set that up next.
We’ll be using redux, redux logger, redux-thunk, redux-immutable-state-invariant.
# redux (our beloved redux)
# react-redux (official react bindings)
# redux-thunk (dispatch async actions)
# redux-logger (DEV: verbose logging for development)
# redux-immutable-state-invariant (DEV: throws an error for mutating state in dispatch)
yarn add redux react-redux redux-thunk redux-logger redux-immutable-state-invariant
Next we need to create our redux store files, we need a store, actions and reducers directory.
mkdir -p src/store
mkdir -p src/actions
mkdir -p src/reducers
cat <<'-EOF' > src/store/configureStore.js
import { createStore, applyMiddleware } from 'redux';
import thunk from 'redux-thunk';
import logger from 'redux-logger';
import rootReducer from 'src/store/rootReducer';

let middleware = [thunk];

if (__DEV__) {
    const reduxImmutableStateInvariant = require('redux-immutable-state-invariant').default();
    middleware = [...middleware, reduxImmutableStateInvariant, logger];
} else {
    middleware = [...middleware];
}

export default function configureStore(initialState) {
    return createStore(
        rootReducer,
        initialState,
        applyMiddleware(...middleware)
    );
}
-EOF
Update index.js to initialize the store at the top and pass it and our Provider to registerScreens.
// Import our store and redux provider
import configureStore from 'src/store/configureStore';
import { Provider } from 'react-redux';

// Configure our store
const store = configureStore();

/**
 * Register all the screens our app will use (internal and external)
 * React Native Navigation automatically wraps the component for us using the provider and store
 */
registerScreens(store, Provider);
Update src/screens.js to use our store and provider, react native navigation will initialize our provider and store for us for every screen we create.
cat <<'-EOF' > src/screens.js
import { Navigation } from 'react-native-navigation';

import HomeScreen from './containers/HomeScreen';
import DataScreen from './containers/DataScreen';

// register all screens of the app (including internal ones)
export function registerScreens(store, Provider) {
  Navigation.registerComponent('rn.HomeScreen', () => HomeScreen, store, Provider);
  Navigation.registerComponent('rn.DataScreen', () => DataScreen, store, Provider);
  Navigation.registerComponent('rn.FirstDrawerScreen', () => HomeScreen, store, Provider);
  Navigation.registerComponent('rn.PushedScreen', () => HomeScreen, store, Provider);
}
-EOF
Create our actions
Actions are payloads of information that send data from your application to your store.
cat <<'-EOF' > src/actions/index.js
import * as AppActions from './app';

// Merge all our actions together and return all creators
export const ActionCreators = Object.assign({},
    AppActions,
);
-EOF
cat <<'-EOF' > src/actions/types.js
// App wide actions
export const SET_APP_LOADING = 'SET_APP_LOADING';
-EOF
cat <<'-EOF' > src/actions/app.js
import * as types from './types';

/**
 * Trigger a loading state (to show an indicator)
 *
 * @param loading bool true or false
 * @returns {{type, loading: *}}
 */
export function setAppLoading(loading) {
    return {
        type: types.SET_APP_LOADING,
        loading,
    };
}
-EOF
Create our reducers
A reducer is a pure function that takes the previous state and an action and returns the new state.
cat <<'-EOF' > src/reducers/index.js
import { combineReducers } from 'redux';
import appReducer from './app';

// Combine all our reducers
// The keys we define here will be used in our component as "this.props.app.loading"
export default combineReducers({
    app: appReducer
});
-EOF
cat <<'-EOF' > src/reducers/app.js
import * as types from 'src/actions/types';

export default function appReducer(state = {loading: false}, action) {
    switch (action.type) {
        case types.SET_APP_LOADING:
            return {
                ...state,
                loading: action.loading
            };
        default:
            return state
    }
}
-EOF
Update the container component
We need to update the container component to use redux, I’ll show the HomeScreen component here, you should update the DataScreen and every other component the same way.
cat <<'-EOF' > src/containers/HomeScreen/HomeScreen.js
import React, { Component } from 'react';
import { ActivityIndicator, Text, View, TouchableOpacity } from 'react-native';
import styles from './styles'
import { bindActionCreators } from 'redux';
import { connect } from 'react-redux';
import { ActionCreators } from "src/actions";

type Props = {};
class HomeScreen extends Component<Props> {
    render() {
        return (
            <View style={styles.container}>
                <View style={{height: 50}}>
                    {this.props.app.loading && <ActivityIndicator size="large" color="#000000" />}
                </View>
                <Text style={styles.instructions}>
                    Home screen {this.props.app.loading === true ? 'is loading' : 'is not loading'}
                </Text>
                <TouchableOpacity onPress={() => this.props.actions.setAppLoading(!this.props.app.loading)}>
                    <Text>Toggle Loading</Text>
                </TouchableOpacity>
            </View>
        );
    }
}

function mapStateToProps(state, ownProps) {
    return {
        ...state,
    };
}

function mapDispatchToProps(dispatch) {
    return {
        actions: bindActionCreators(ActionCreators, dispatch)
    };
}

export default connect(mapStateToProps, mapDispatchToProps)(HomeScreen);
-EOF
We created simple bare-bone skeleton for our app.
- React Native Vector Icons
- React Native Navigation
- React Native Splash Screen
- Redux
Troubleshooting React Native Development
I’ve included some of the issues I had, and the things I’ve learned during the development of React native projects.
Debugging
For testing on your device, make sure your on the same network and modify your AppDelegate.m as shown here (add the IP instead of localhost).
Debugging Production Errors
If you have errors in a react native app, you’ll usually see a well-described error and stack trace in your development environment, in production this is more difficult as you don’t have access to the development tools.
In this case, you can use libimobiledevice, libimobiledevice allows you to stream the logs from your iOS device to your terminal for debugging. This streams all logs (even that of the iOS device itself).
You can filter through these and find the cause as to why your application crashed.
This works in production apps as well so it’s awesome for those pesky production only bugs.
# Install app logger (so we can log on our real device ipad)
brew install libimobiledevice

# you might need to do this
sudo chmod 777 /var/db/lockdown

# pair the device (tap trust on the ipad)
idevicepair pair

# !! dumps all the logs as they happen!! close the app, start it, all logs will output to terminal
idevicesyslog

# <Critical>: Attempting to change configurable attribute of unconfigurable property.
# <Critical>: Module AppRegistry is not a registered callable module (calling runApplication)